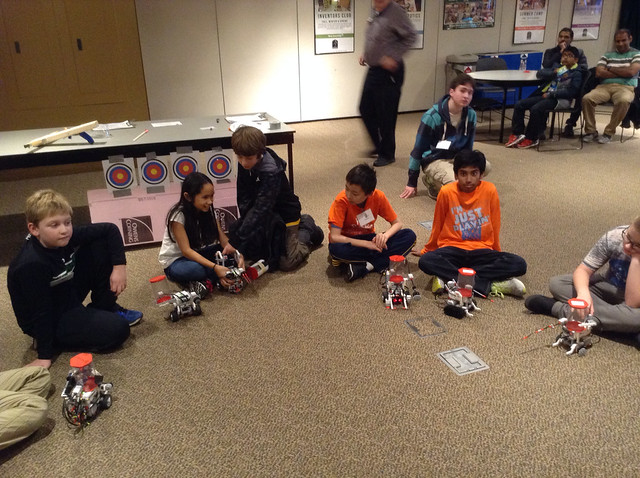
Inventors Club for winter 2016 has come to a close, and we couldn't be more pleased with the projects that were presented by the students last Saturday. As usual we were joined in the Big Show by the kids in our Lego Robotics class who were also demonstrating what they had been working on. Family and friends of the program participants got a chance to see everyone's progress, and hear in their own words what they'd been doing for the last 6 weeks.
The first two weeks of Inventors Club are always spent working side-by-side on planned activities. These activities are designed to teach a concept, develop a skill, or introduce new possibilities to the students, and hopefully all three. The activities for both the morning and afternoon groups were based on similar ideas, but because of the age and experience differences between the groups, they took those ideas in slightly different directions.
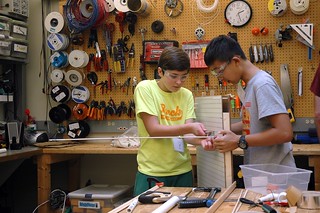
Figuring out the puzzle circuit boxes.
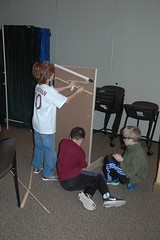
In the previous session we started with learning how to interpret circuit diagrams. Our activities this session were planned to continue that process. On the first day the morning group first worked on trying to infer a circuit by its output. They were given pizza boxes with lights sticking out. When they connected a battery to two of the 8 terminals on the sides of the box they would get some combination of lights to turn on. They were given the challenge of making a drawing of how the lights were connected inside the box based on what they learned by experimenting with the terminals.
It was great to see how successfully they figured out all the circuits. This was followed by a conversation about what circuits can do, how they could incorporate circuits into their projects if they'd like, and some tips for drawing circuits so they can be easily understood. The rest of the class was spent on safety training for the workshop.
The afternoon group had a similar focus on circuit diagrams, and started with the same puzzle box activity. After that, however, the idea was to teach them about circuits that kids commonly ask to make in the workshop. This first week they built a simple tone generator with pitch and volume control. After some instruction on what they were going to be doing, they worked from a diagram with the help of staff and volunteers to put the circuit together on a breadboard. Some of the kids had more experience with this and after getting their circuit working they moved on to soldering the components together onto a circuit board to have a permanent example.
Week two for both groups saw more circuit building. In the morning they put together Drawdios; a simple tone generator similar to what the afternoon group had built the previous week, but instead of controls it includes a pencil so that as you draw with it you get different pitches in the sound coming out of the speaker. In the afternoon, to continue the theme of common requests, they built audio amplifiers, complete with their own speaker, that they can plug into a phone or other device.
Programming an LED matrix display.
The rest of the 4 weeks were spent designing, making, and improving their personal project ideas which they showed off at the Big Show last week. This session saw projects like cars, catapults, a launcher for a model rocket, a spinning light display, a snowball maker, a mechanical encryption machine, a foam pellet cannon, and more.
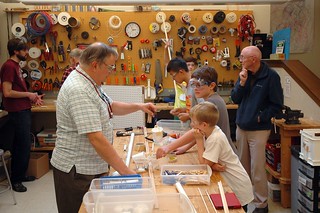
Building a snowball maker.
It was quite the varied show and tell, and a lot of fun. We're looking forward to the spring session starting up on April 2nd and seeing what kinds of inventions come out of the workshop after those six weeks!
Plans showing the progress from motorized baby carriage to motorized bed.
We explored the complex, yet exciting world of robot jousting during fall session of The Bakken's Robotic Challenges!
The History
We reviewed what jousting was, when it took place, and how it worked. We took our inspiration from medieval jousting. The sport where two knights would charge one another on horseback with a lance (a long stick) in hand and try to strike, or better yet unseat their opponent. We wanted to see if we could recreate this sport with robots.
We created basic robots and learned to control them. Many of the students have either participated in this program before or had previous experience building and program robots. The robots were quickly constructed and mobile. Even for the few students who have not programmed robots before, they did a great job of diving in. Working through some of the programming tutorials in the manual proved very useful later on for our newcomers.
Each student built their own robot. Eventually alliances formed and the most battle ready robots emerged, while other bots served as back-ups or were raided for parts. Each robot had it's own personality and flare. In addition to each team building a robot, they were required to have a rider. So we used some plastic containers. Some containers served as the riders chamber while other turned into the rider.
The Journey
Once the first round of robots were constructed we found that they were not totally compatible, so we needed to establish some basic rules of jousting as they pertained to our robots. We kept our rules simple and adjusted them as the sport evolved. We ended up with essentially three rules.
Lance on the right of the robot
Rider on Top of the robot
Each robot should have 2 sensors
One to indicate if the the lance has struck another robot
And a second to detect if the rider had been up seated.
Rule number 3 required us to think through some programming. We used the touch sensors to detect hits and track whether the rider was still seated on the robot. We figured out a couple of ways to make it work, but the most reliable way involved the nesting of some If blocks.
Practice, Practice, Practice
Once the robots were operational and operating by the same rules we had many practice bouts. While the robots did not act as intended, information was gathered. Iteration and improvement is a BIG part of the invention process. It was fun to watch the robots get refined and tweaked as we figured out what strategies and technology worked best.
Sometimes that took a couple of tries, but that is part of the fun. You know what they say... if at first you don't succeed, reposition your robots.
Some of the students came up with some excellent additions to their robots. I really like the way many of the students added lights or sounds and connected them so there was some feedback provided by the robot when it struck the target or was struck by a lance. Tournament
Once the robots were ready, we arranged a little tournament. In order to have a tournament we needed to be able to establish a clear victor. We decided to create a scoring system.
3 points for a knock off, where the rider is unseated from the robot
2 points for a registered hit
1 point for a draw
Each match consisted of three bouts and the victor was determined by the total score for the match.
I was really impressed with sportsmanship and enthusiasm share by the students. Regardless of who won everyone had a good time.
This Saturday marks the end of another round of Inventors
Club, and we’re expecting quite a variety of projects to be finished and demonstrated
for friends and family. This time around
we have all sorts of things from a crossbow and a mechanical pencil shooter, to
a handmade sheep that rolls around and a cardboard dog with lights that blink. We’ll have a couple cars, a couple airplanes,
and even a hovercraft. There’s a
portable Nintendo 64, a binary adder circuit, and an audio amplifier or two. There will even be at least one robot, the
beginnings of a go-cart, and a Mars rover.
Working on the circuits for a robot.
Every session of Inventors Club ends with the Big Show. This is when the students get to show off
what they’ve been working on, and explain it to their loved ones and everyone
else. At the Bakken, we believe that discussing
one’s work is an essential part of inventing and engineering, whether that’s
done through talking or writing. Because
of that, we like to give our participants the chance to explain their work to a
group of people, and also do a small write-up about it. Hopefully this provides an opportunity to
work on their communication skills, and also helps them feel a sense of pride
in what they’ve accomplished.
An in-depth discussion on soldering.
This may be the end of the fall session, and with all the
holidays coming up we won’t have the next one starting until the last Saturday of January, but we’re certainly looking forward to seeing another set
of new projects, and to seeing the long-term projects return for more
work. In the interim we are still
running our Thursday night “Passport to Invention” open workshop program, so
any child ages 9 and up can still feed that hunger for inventing all winter long.
The Fall 2015 session of Inventors Club has begun, and what
a start we’ve had. In both the morning
and afternoon groups we spent the first Saturday of the program discussing circuit
diagrams and cams. We talked about how
to read a simple circuit diagram, and what some of the most common symbols
mean. This prepared everyone for working
with the circuits needed for our big group project. All that was needed was a conversation about
cams. After talking about what cams are,
and various ways they can be used, everyone started making their own cam and
switch assembly. The goal of the project
was that everyone has a cam on a motor which presses a switch when it
turns. Then, with the motor running, the
switch spends half the time pressed and half the time released, and is
connected to two LEDs so that when it goes between pressed and released the
circuit alternates between lighting one LED or the other. After the second Saturday of working on this we
were able to put everyone’s LEDs together and watch them all blink in a fun
sparkly display.
Discussing the PWM circuit.
On the second day, the morning group continued working on
the cams and switches, but in the afternoon we added a whole new piece. The afternoon group used a more complicated
circuit diagram to build a pulse width modulation (PWM) circuit. As usual, we of course started with a discussion
of PWM and how it can be used to control the speed of a motor. Some of the mentors even used an oscilloscope
to show the students what the electricity from a PWM circuit is doing and how
it affects a motor. The students added
their PWM circuits to the cam circuits they already built, and we were able to
not only blink the LEDs, but also control the rate of each pair’s blinking.
Now that we’re up to week 3 it’s time to start working on individual projects. The kids will spend the next 4 weeks designing, building, improving, and showing off their own creations. Bakken staff and mentors will help them create with our tools and materials whatever fun things they can imagine. Then, after showing it all off to parents, friends, and museum visitors, the students will take home their inventions.
It seems like it was only yesterday that we were finishing
up our winter sessions of Inventors Club and LEGO Robotics, but here we are
already in the thick of it with spring Inventors Club, and LEGOs about to start
up again. These last two Saturdays we had
our introductory activities with the Inventors Club kids. On the first day we had fun with some of our
usual activities like simple circuit building, and safety training for the
workshop.
However, this time we had a couple new goings-on. Both the morning and afternoon groups got to
meet, hear from, and work with Rich Kronfeld, our Inventor in Residence. He joined us to talk about his new invention,
the Raht Racer (a pedal powered electric car/bike hybrid), and help the kids work on the activities of these last two
weeks.
Rich explaining the Raht Racer.
Prototyping a slot car track.
Also, to coincide with having
Rich and the Raht Racer here at the museum, we worked on making our own vehicles
in the form of homemade slot car tracks, and then our own homemade slot cars to
run on those tracks.
Testing out a track-powered car.
To run the cars, we connected hand crank generators to the
tracks so that, like the Raht Racer, our vehicles could also be human
powered. There were a lot of creative
solutions to the challenges of both the track and the car, and it was great to
see what neat new ideas the kids were able to come up with.
Now that we’re coming up on week three, the kids will be
starting their own individual projects to take home on May 16. A small group of volunteers, instead of
working on their own projects, will work as a group along with Rich and Bakken
staff on one large group project related to the previous activities, and Rich’s
invention. We look forward to seeing
what they create, and showcasing it both in the museum and elsewhere.
We’re halfway through our winter LEGO Robotics classes here
at the Bakken Museum, and we’re starting to really get into the meat of what we
can do with these robots. The first week
we built them, and learned how to design simple programs right on the robots
themselves. We did some simple
challenges at the end of the class like driving the robot in basic shapes, such
as a square or a circle.
This last Saturday, we got out the laptops and learned to
program our robots with the help of computers.
For this we bumped up the difficulty of the challenges, and the robots
had to make their way through a simple maze, or use sensors to either interact
with or avoid their surroundings.
For this upcoming Saturday we’re going to learn how to more
effectively use the sensors for what we want the robot to do in order to get
ready for the big show at the end of class next week. At the big show, family and friends will be
able to see the results of all our work as we demonstrate our skills by having
the robots safely drive themselves along a "road" in the morning, and with a sensor-dependent
parade in the afternoon. We’ll give more
details on those in another post.
We have another round of our LEGO Robotics class starting up in
the spring on April 25th, so check out the museum’s website for
information on how to sign up. http://www.thebakken.org/youth-programs
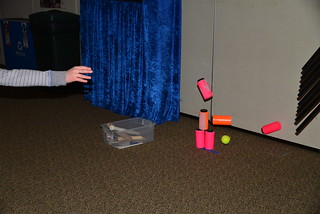
The winter session of Inventors Club began with a carnival. Set up around the room we had four carnival games set up for the students.
"Hey, wait a minute. There is something in this jar!" BUSTED We were in fact playing crooked carnival games.
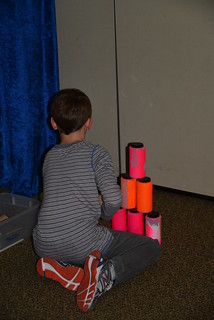
Thus began our challenge: Can you design a tool that will help you win the carnival game every time. We even turned the process of solving the challenge into a game.
Each time the students tried out their device, regardless of the results, they got more materials. The game was designed to encourage the students to fail fast when prototyping and try lots of different solutions.
Our students came up with many unique and creative solutions to help them master our crooked carnival games.
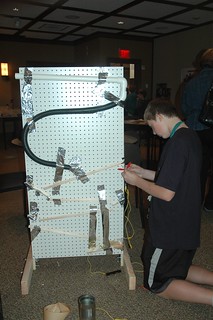
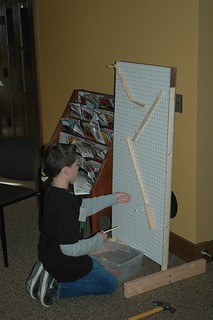
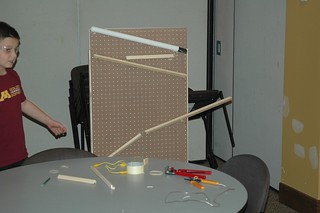
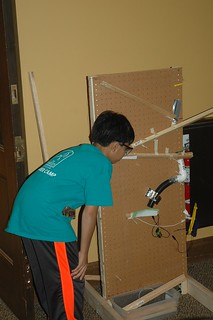
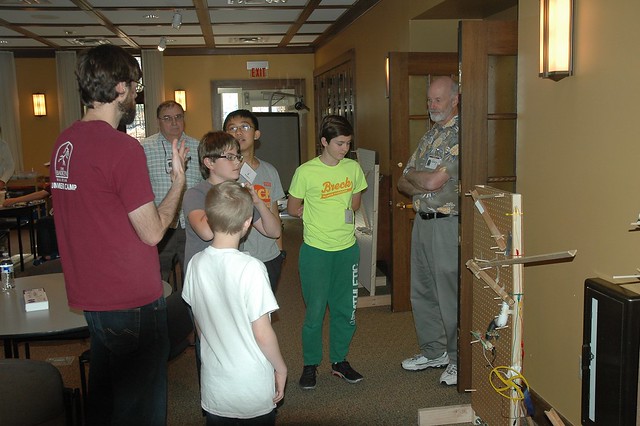
We have been investigating mechanical computing machines during Inventors Club this fall. So natural we wanted to build our own.
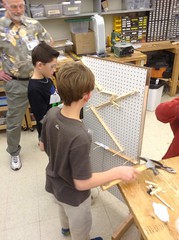
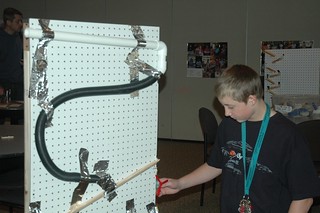
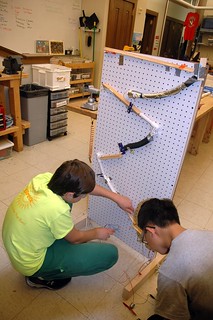
Our Explorers group in the morning were working in teams to make a marble machine that would guide a marble from the top corner to the bottom corner of the board. The marble machine got more interesting when the students added circuits into their machines. When the marbles arrived at the end of their journey they completed a circuit, announcing to the world that their journey was complete.
Afternoon Inventors were also working on the Computing Machines.
Their goal was a little more intricate. They were challenged to develop a machine that would count the number of marbles put into the system or do something after 5 marbles were added to the machine.
The more I read about mechanical computers the more fascinated I become. I wanted to share some of the stories and resources I shared with the Inventors Club students from the Fall session.
To understand what a mechanical computer is we have to think about what a computer is. I think of a computer as a machine that deals with information. You give a computer some input, the computer works with that information and gives you some information back. If we think about computers in this broad sense we can argue that computers have been around for 1000's of years.
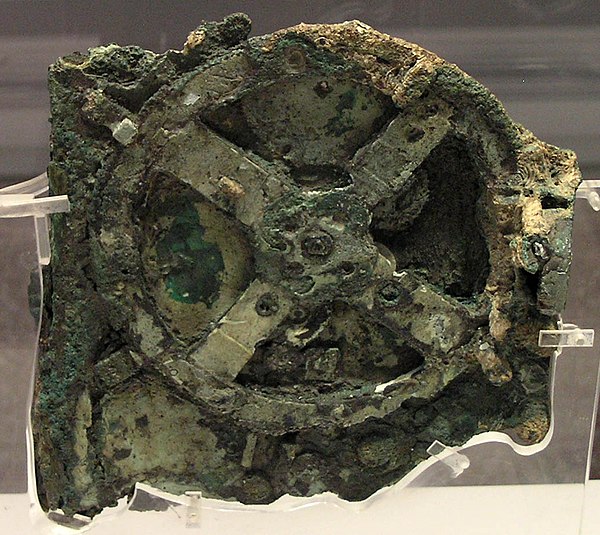
One of the oldest examples is the Antikythera. This machine was a complicated system of gears that would model the motion of the planets and moon. It even predicted eclipses. It is speculated to be the work of Archimedes. It is an amazing feat of engineering. There is a great NOVA episode exploring this early computer and the story of how a group of scientist reversed engineered this complicated device. It is fascinating!
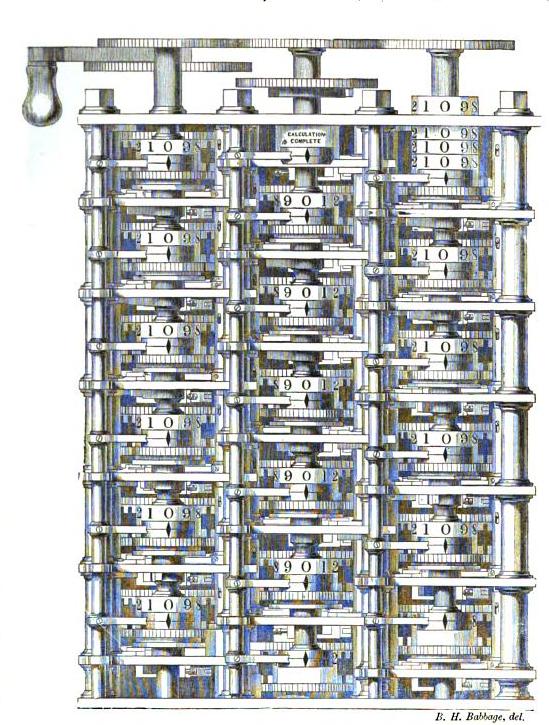
Charles Babbage often gets credit for designing the first modern day digital analogue computer. Babbage started first on a difference engine in 1822. This machine would calculate polynomial functions by subtraction. Before he completed his device he began to imagine a more sophisticated machine that could perform many more operations. This machine came to be known as the Analytical Engine.
Here are some fun examples of more recently constructed mechanical computing machines.
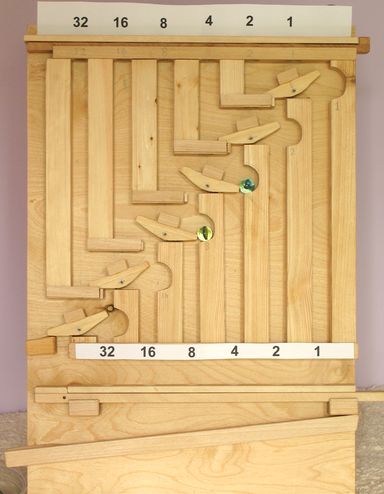
Binary Adder - This machine is not particularly old, but I still think it is pretty interesting.
The machine uses marbles to add binary numbers together. Each rocker can represent a 0 or 1. Here is a good video describing how it works.
Another fun mechanical computer is Evil Mad Scientist's giant DigiComp II. This machines uses marbles, or eight balls in Evil Mad Scientist's case, to do addition, subtraction, or many other computations.
Our final example of a mechanical computer is a ball clock. In this machine each marble represents a unit of time. Once a minute a new ball would be added to the top of the ramp. Can you tell what time it is according to this clock?
Were you thinking 8:38? Give your self a back on the back.


 In the previous session we started with learning how to interpret circuit diagrams. Our activities this session were planned to continue that process. On the first day the morning group first worked on trying to infer a circuit by its output. They were given pizza boxes with lights sticking out. When they connected a battery to two of the 8 terminals on the sides of the box they would get some combination of lights to turn on. They were given the challenge of making a drawing of how the lights were connected inside the box based on what they learned by experimenting with the terminals.
  The afternoon group had a similar focus on circuit diagrams, and started with the same puzzle box activity. After that, however, the idea was to teach them about circuits that kids commonly ask to make in the workshop. This first week they built a simple tone generator with pitch and volume control. After some instruction on what they were going to be doing, they worked from a diagram with the help of staff and volunteers to put the circuit together on a breadboard. Some of the kids had more experience with this and after getting their circuit working they moved on to soldering the components together onto a circuit board to have a permanent example.
 The rest of the 4 weeks were spent designing, making, and improving their personal project ideas which they showed off at the Big Show last week. This session saw projects like cars, catapults, a launcher for a model rocket, a spinning light display, a snowball maker, a mechanical encryption machine, a foam pellet cannon, and more.


